Thursday, October 29, 2015

Instant Oat Bread

I was given a sample pack of instant oat, just nice to make 1 portion. In the family, we don't really crave for blanching an instant oatmeal. How do you fare?

Surprisingly, when it is put to good use in the Bread Machine, it churns a very good loaf of soft bread. Try this.

Instant Oat Bread (500g loaf size)

Ingredients:

Cooked Oat:
20g       Instant Oat
100g     Hot water

Main ingredients:

120g      Cooked oat
75g        Water
15g        Caster sugar
2.5g       Salt (1/2 tsp)
250g      Bread Flour
25g        Unsalted Butter
2g          Instant dry yeast (1/2 tsp)


As you can see here, it is a Free Sample that I have gotten from my other purchases from NTUC Stores.


Method:

Step 1: First, Blanch the Instant Oat with Hot Water to yield 120g of Cooked Oat. Let the Cooked Oat rest at room temperature to cool.

Step 2: Pour in the Cooked Oat into Bread Pan, follow by water, then sugar and salt on each opposite sides of the Pan.

Step 3: Add on Unsalted Butter as part of liquid ingredients stated in my Bread Machine's User Manual. So remember to check yours.

Step 4: Pour Bread Flour into bread pan, covering all the liquid ingredients and dig a small hole for the Yeast.

Step 5: Pour in the Yeast.

Step 6: Transfer the Bread Pan back into the Bread Machine and Locked it as per the direction of your machine.

Step 7: While it is mixing and blending to form dough, you may peep to check the Bread Machine.

Step 8: There are always 2 stages of proofing of the bread dough. Notice a slightly bigger size after the second proof? No more peeping after second proofing as the Bread Machine will run on baking.

Finally you will have a nice soft loaf of Instant Oat Bread. Savor your achievement and enjoy! Again, Remember to cool the loaf for at least 30 minutes before cutting the bread for otherwise, the Bread will turn wet. I would usually leave to cool for 1 hour on a safe side.

p/s: After trying this Instant Oat Bread, I started to like instant oat. Cheers!

Tuesday, October 27, 2015

Sumptuous Gula Melaka Kaya

My husband has been asking for Gula Melaka Kaya, imagining his thoughts of having the traditional spread with the Homemade Hokkaido Toast that I have just made. There are many recipes available for this all time favorite but I have tweaked it to a just nice level of sweetness as I don't like it overly sweet. The following recipe yields a full bottle of 430ml glass container that you can get from Daiso.


Gula Melaka Kaya

Ingredients:

70g            Pandan leaves juice
4                Eggs
200ml        Coconut milk
120g          Gula Melaka (2 rolls from the packet shown)
70g            Caster sugar

Gula Melaka Kaya - Ingredients.


Method:

I have pre-extracted the Pandan leaves juice for my other cooking needs and store in fridge. If you do not have that, you may blend 5 pieces of Pandan leaves with 50g warm water. 

Step 1: Crushed the Gula Melaka rolls for easier melting in the Bread Machine, break the eggs and just slightly beat the egg yolks.

Step 2: Pour in All ingredients into the Bread Pan. Remember that the stir bar/blade Must be put into the bread pan.

Step 3: Transfer the Bread Pan into the Bread Machine.

Step 4: Select the Jam Function and press Start. It will run for 1 hour and 20 minutes.

Step 5: When Bread Machine completed the Jam cycle (1 hour and 20 mins), check the texture. If the batter is still wet like in my case, then run the Jam Function again. In this case, I have run the Jam Function for another 30 minutes. Therefore a total of 1 hour and 50 minutes to cook the Kaya batter.

Step 6: Transfer the batter to a bowl to let it cool.

Step 7: Once it almost cool, transfer the batter to a Blender.

Step 8: Blend the Kaya Batter till smooth.

Transfer to a glass container and savour as and when you like it. Trust me! Once you have had this, you wouldn't want to buy those Kaya from the commercial stores anymore.

Creamily Aroma Hokkaido Loaf 奶油香北海道土司

Yesterday, I have made an aromatic Hokkaido Loaf tweaking the recipe to have more of the whipping cream instead of fresh milk. The Loaf is softer than the usual Bread Loaf that I have been baking so far. Without further ado, here's the recipe:

Creamily Aroma Hokkaido Toast (750g loaf size)

Ingredients:

200ml      Whipping Cream
1                  Egg
40g            Caster sugar
4g               Salt (3/4 tsp)
270g          Bread Flour
30g            Cake Flour
15g             Milk powder
5g               Instant dry yeast (1+ 1/2 tsp)

Method:

Step 1: Pour in liquid ingredients into the bread pan i.e. Whipping Cream and Egg, follow by Sugar and Salt, each taking an opposite corner. Please note that different Bread Machine sets a different sequence for pouring the ingredients. Do remember to check your Bread Machine's instruction manual.

Step 2: Then pour in Bread Flour, Cake Flour and Milk Powder. Be sure to cover up all the sides of the liquid ingredients. Then, dig a small hole in the center to pour in the Yeast.

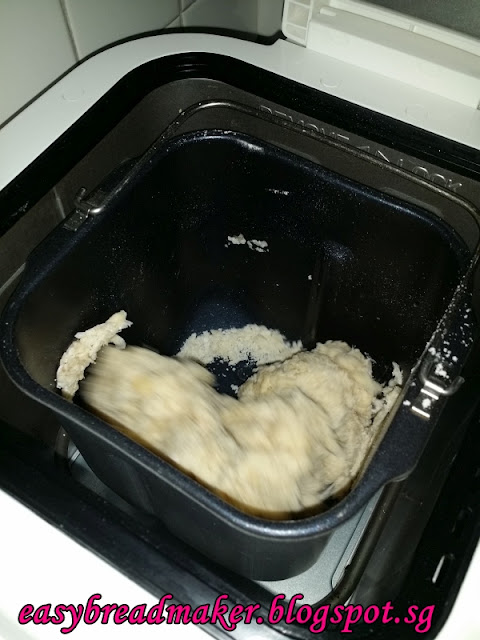
Step 3: After you have pour in all ingredients into the bread pan, transfer the bread pan into the bread machine. Press Basic Function, choose a 750g loaf size and Medium for color of loaf. Then, Press Start. The first 10 mins, the bread machine will mix the ingredients to make a dough like the image shown above. You can then let the machine run on its own and you can sit back to relax.

Once the Bread Machine stopped, remove the loaf to a wire rack to cool for at least 30 minutes to 1 hour.

Tada! A soft and creamily aroma Hokkaido Loaf without any preservatives. Now isn't that one healthy food. 

My First Loaf: Aztech Basic Loaf

When we purchased our Breadmaker, the usual thing that we did was to go through the User Manual that comes with the bread machine. Imprinted in the manual, there are some basic recipes for the functioning of each setting prefix by the bread machine. The first thing to do is the First Time Activation of the bread machine where we are required to do an empty Bake for 10 mins, just like what we will do for all ovens. There will be some smoke and burnt smell during the empty bake, which is perfectly normal.

After activating the functioning of the bread machine, I baked my very first Homemade Basic Loaf using the Recipe in the User Manual.


Aztech Bread Loaf Recipe (500g Loaf)

Ingredients:

160ml     Water
1              Egg (60g)
15g          Unsalted Butter
2.2g         Salt (or 1/3 tsp)
18g          Sugar 
10g          Milk Powder
240g        Bread Flour
2.5g         Instant Dry Yeast (3/4 tsp)


Method:

Always remember to pour in the liquid ingredients into the bread pan, follow by salt and sugar, each on opposite sides, then pour in the dry ingredients i.e. milk powder and bread flour. Instant yeast will be the last. Do note that I have put in Unsalted Butter right after the liquid ingredients as stated in the User Manual. Some bread machines require the sequence of butter to follow right before the yeast. So do check the User Manual that comes with your bread machine. 

p/s: My first loaf and so the Instant Yeast is spread all over the top of all the ingredients. This is Totally Wrong. To ensure that the Yeast are not killed, after pouring in the Bread Flour, you'll need to dig a small hole and pour in the Yeast. This will ensure that the yeast are not mixed with salt that act as a balancer so that the dough will not rise too much and collapse.


Step 1: Pour in the Liquid Ingredients follow by salt and sugar at each corner then butter, flour and yeast.

Step 2: Once all ingredients in the Bread Pan, put the pan back into the machine and Press the Basic Function. Then, sit back and relax to see that the ingredients are being automatically mixed, knead into dough and being proof before it is being baked.

Step 3: After the proofing process, the bread machine will start to bake. During the baking, do not open the lid of the machine but you may peek through the window of the lid.

Tada! Finally finished the Bake of my first loaf.

Have a wire rack ready to place the bread for 30 mins to cool the bread. Remember to be patient as bread that have not been cooled long enough will be wet entirely when you cut it. Trust me, I have tried this before!

Final Product! I am tapping myself on the shoulder for this first successful bake!

Saturday, October 24, 2015

The Start of my Breadmaker Journey

Dear Friends,

My name is Yune and I've never fancy bread loaf before until I've bought an Aztech ABM750 Bread Machine in September 2015.

Homemade bread loaf changes my perspective through my taste bud and I found that there are more to this Breadmaker than for making bread alone. Come join me in exploring a gem that I have found for my kitchen.   

各位朋友们,

我的名字是Yune。从小就不怎么喜欢享用商场买的面包。可是自从在20159月我买了一台Aztech ABM750面包机,我就对面包改观了。自制的面包是非常好吃的!不只是可以做面包,厨房有一台面包机真的是一个宝。请大家和我一起来理解 一台面包机怎么可以是一个宝吧。


First of all, you will need to get a Bread Machine.
首先,您必须买一台面包机。


And a weighing scale together with a plastic/silicon spatula
也需要一个秤和塑料抹刀


Then, we shall look at our Easybreadmaker's Recipes that follows.
然后,我们一起去看看 Easybreadmaker 以下的食谱。


Salam Bahagia Kawan-Kawan Sekalian,

Nama saya ialah Yune dan sejak kecil, saya tidak suka makan roti yang dibeli dari kedai sehinggalah saya membeli mesin pembuat roti pada bulan lepas, saya mula menyukai roti.

Roti buatan sendiri memang lain daripada yang dibeli dari kedai dan ia sememangnya lebih enak! Setelah sebulan menggunakan mesin pembuat roti, ianya bukan sahaja hanya boleh membuat roti malahan adalah permata dapur yang boleh membuat pelbagai resipi yang senang belaka. Marilah sertai saya menerokai permata dapur ini.